BY OREDOLA IBRAHIM
The first part of this registration process can be found here.
Oh! Yeah, congratulations, your name reservation request has been approved! You are now ready to go to the NEXT LEVEL – where you make the payment for your business name and claim it as your own. Unfortunately, if you get the mail that your name reservation request has been disapproved instead, you need to go back to STEP 4 and edit your name.
If you are re-editing your name, do take note that it is like you are doing it all over again, so you have to pay your name reservation fee of N500 again and this applies every time your name gets disapproved.
However, you can reduce the chances of getting your name disapproved by NOT going for names that are capable of misleading as to the nature and extent of its activities; undesirable, offensive or contrary to public policy; identical with or similar to the name of a registered company unless the registered company is in the course of dissolution and consents in writing of the directors obtained; contain the phrase “Chamber of Commerce” unless it is a company limited by guarantee; would violate any existing trademark or business name unless with the consent of the trademark or business name owner; and/or would violate any incorporated trustee unless with consent of the trustees.
Advertisement
Now that your name reservation request has been approved, it is time to go to the NEXT LEVEL.
STEP 8
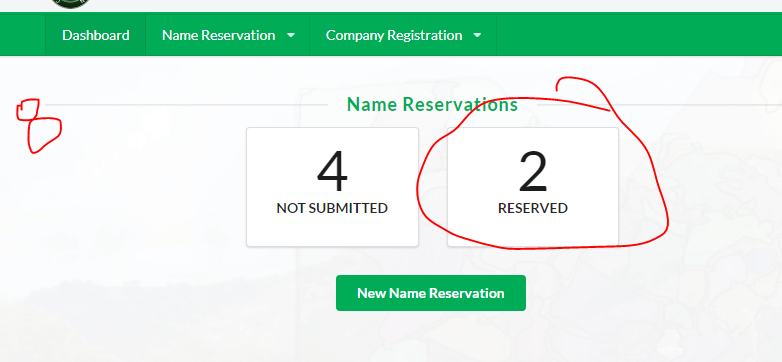
Log in to your dashboard with your username and password. Once you are logged in to your dashboard, you will see a box tagged “Reserved”, there you will see and download your “Approval Notice”.
Advertisement
STEP 9

On the menu, click on “Company Registration”, you’ll see a drop-down, click on “New Registration”.
STEP 10

Here, you will see a notice that states “Kindly note that by starting registration as a public user, you agree to become a director, proprietor or trustee as the case may be.” what that simply means is that you can only register a business for yourself with your account.
Advertisement
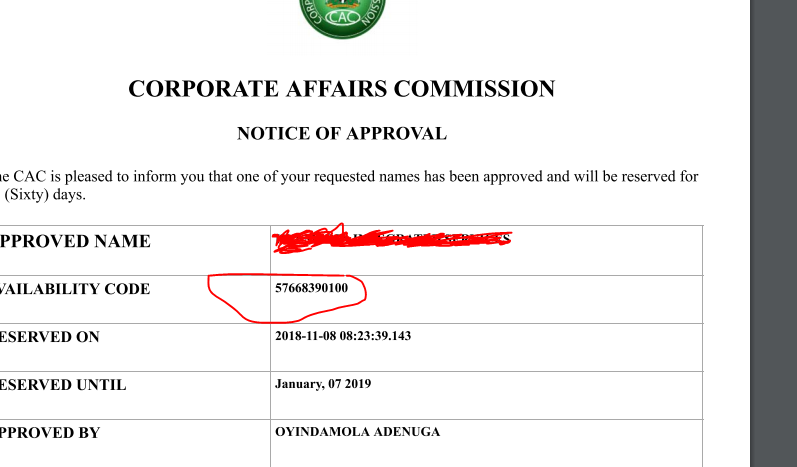
If you must help someone register their business then you have to (create an account in their name) do it with their account. Next, it will ask for your “Availability Code”. Go back to the approval notice you downloaded in STEP 8, there you will see the code. It is a number, all you have to do is copy and paste it in the field here.
STEP 11
It takes you directly to where you fill out further details about your proposed business. This step is similar to what we went through under STEP 4.
STEP 12
COMPANY DETAILS Section
Advertisement
Under this you will see “CLASSIFICATION”, select ‘Business name’ in the drop down.
You will also see “BUSINESS COMMENCEMENT DATE”, pick the date from the calendar
Advertisement
And lastly you will see “ADDRESS”, confirm it is correct.
Then you need to save and proceed to the next section.
Advertisement
STEP 13
NATURE OF BUSINESS Section
You will see a drop-down. It is a list of business sectors. So, you will choose the one that most applies to your business.
Advertisement
You will see a field beneath it, you can input a word or two that explains your business e.g Information and Communication.
However, if you are the type of businessman that just ‘hustles’ everything together, you can choose and input “General Contract and Merchandise”.
When you are done with this section, save and proceed to the next section.
STEP 14
PROPRIETORS Section
Here your details is already there since the owner of the account is automatically a proprietor of the business. However, if you do have a partner, you can go ahead and add them as a proprietor. You’ll see “Add A Proprietor” then proceed to fill up their details like Name, Telephone, Email, Gender, Date of Birth, Contact Address and a means of identification just like in STEP 6.
STEP 15
CERTIFIED TRUE COPIES Section
Here is where you choose if you want more than a copy of the Business Name Registration certificates and of course you pay 5,000 Naira for every additional copy. So, I think you should just leave the section and not fill anything. Just proceed through to the final section where you will have to pay N5,000 through REMITA.
STEP 16
Once your payment is successful. Login back to your dashboard. Under “Company Registration” you will see your Business name under “Pending Approval”. Click it. That brings you to the “My registration section” and opposite your name, you will see “Documents”, click on it.

STEP 17
From the step above, you will be taken to the page where you will download the file named “Application Form for Business Name”. The form has already been filled with your details. You just have to do three things after printing it out:
- Affix your passport
- Sign the document
- There’s a space for “Commission for Oaths” to sign. Take it to the any court nearby or a justice of peace and get it signed for between 300 to 1,000 Naira depending on where you are.

STEP 18
Once you have completed the form, you will be required to scan it back in one pdf and upload at the “Document Upload Service” where you can get to from “Company Registration” menu.

STEP 19
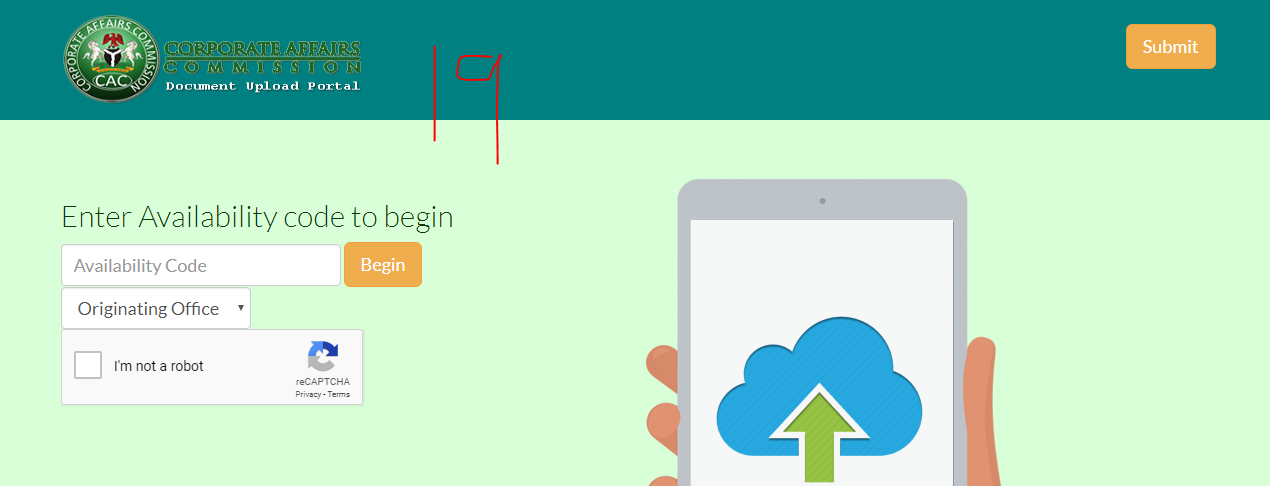
At the “Document Upload Service” page, you will be requested to enter your “Availability Code”, the same one we used in STEP 10. Then select your “Originating Office” where you’d like to collect your certificate when it’s ready. Complete the robot check and click on “Begin”.
STEP 20
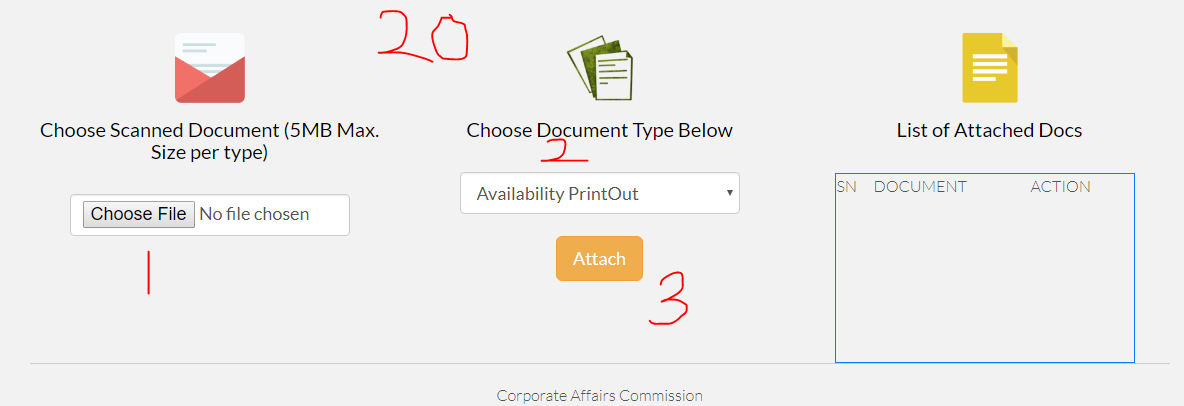
Now you will be taken to where you will be able to upload all the required documents. The documents you will be uploading are the following: a. Business Name Registration Form that you filled and scanned b. The Approval Notice you downloaded in STEP 8 c. The payment receipts for the N500 and the N5,000 d. Your means of identification. You upload in the following order:
- First you browse to select the document
- Choose the document type
- Click “Attach”
And you will do that for each of the documents.
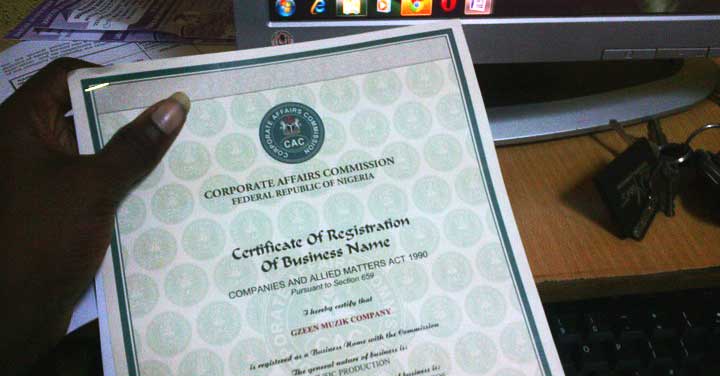
After you are done with the step above, you should get a mail in less than 48 hours that your business has been registered! And you can proceed to the CAC office address (you specified earlier while registering) with the hardcopy printouts of all the documents you uploaded in STEP 20. All you have to do is tender those documents and you will be given your Business Name Certificate.
Congratulations! You are now a proud owner of a new business…. I mean, it is your turn to move to the NEXT LEVEL. If you have any question, please feel free to use the comment, I will respond to all your questions.
Ọ̀rẹ́dọlá Ibrahim is the CEO of SkillNG and can be reached via [email protected]
Views expressed by contributors are strictly personal and not of TheCable.
2 comments


Thanks for the info but i have been trying it for the past two months am yet to upload the documents please kindly assist me thank
To expand my business